
Microsoft Outlook er en uerstattelig del af nutidens erhvervsliv. Medarbejdere og partnere i erhvervslivet udveksling udføre korrespondance via Outlook og andre e-mail-klienter. Hvad gør Outlook ejendommelig og skille sig ud af forskelligartede anden software og klienter? dens multifunktionalitet. Man kan være nødvendigt at sende en e-mail, holde fortegnelser over adresser og kontakter eller sende en kalenderinvitation i Outlook.
Sådan sender du en kalenderinvitation i Outlook, og hvorfor man kan få brug for dette
At sende invitationer via e-mail er meget populært blandt de virksomheder, der har fjernarbejdende medarbejdere eller tilbyder fleksible tidsplaner. Derfor vil viden om, hvordan man sender en kalenderinvitation i en Outlook-e-mail, være praktisk for næsten enhver nutidig medarbejder. Lille- til store virksomheder gør brug af fordelene ved denne Microsoft e-mail-klient.
Der er flere muligheder for, hvordan man sender en kalenderinvitation til nogen i Outlook. Først, det er nødvendigt at oprette et nyt møde, der kan gøres på følgende måder:
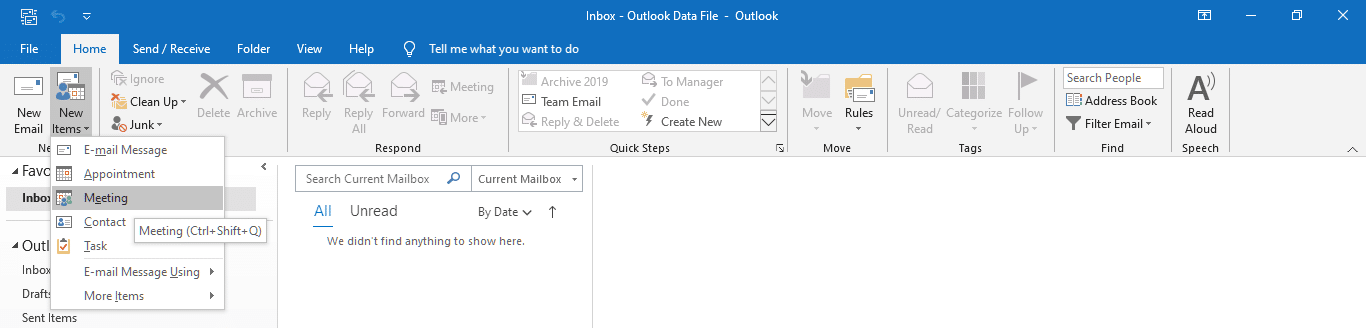
- I øverste venstre hjørne, Klik på Nye genstande ➸ finde Møde, og tryk på den.
- I venstre hjørne af skærmen, tryk på Kalender ikon ➸ efter, Klik på Nyt møde eller Ny aftale.
- Når du modtager en e-mail, Klik på Svar med Møde.
Sådan Send en kalender Inviter i Outlook 2010/2013/2016: Flere hints
Derfor, hvis du har brug for at vide, hvordan du sender en kalenderinvitation i Outlook 2007 eller andre versioner, udfyld et af ovenstående trin og fortsæt med at vælge deltagerne. I denne henseende, før du overvejer, hvordan du sender en kalenderinvitation i Outlook online, det giver mening at have alle de nødvendige e-mails i adressebogen, så man undgår manuel indtastning, der kan føre til fejl.
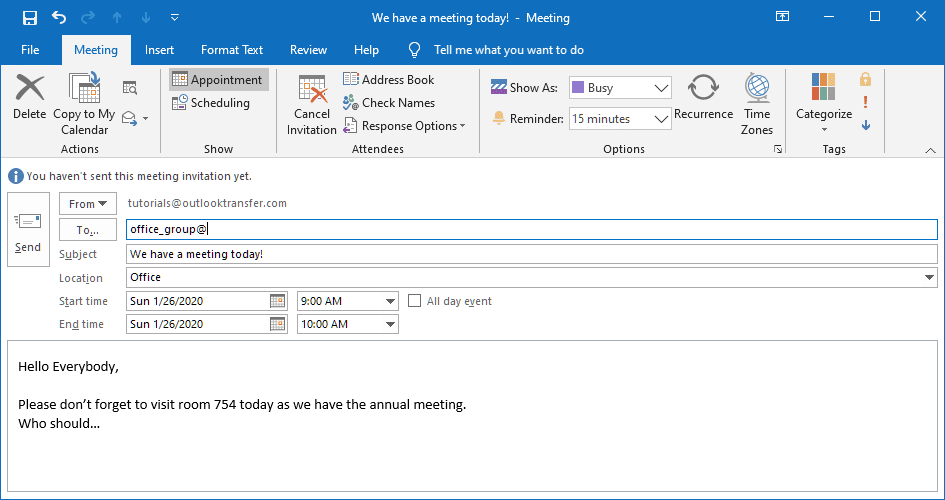
Derudover, det er vigtigt at huske, at det er en officiel korrespondance at sende en sådan invitation. Derfor skal du sørge for at tjekke alt, før du trykker på knappen Sende. Emne, modtagere, Beliggenhed, starttidspunkt og dato, sluttidspunkt - alle disse skal verificeres.
Hvis du har brug for at vide, hvordan du sender en kalenderinvitation i Outlook 2016, du kan følge ovenstående anbefalinger. Alternativt, der er også mulighed for at bruge kombinationen af ➯ Ctrl + Flytte + Q.
Sådan Send en kalender Inviter i Outlook 365: Ejendommeligheder at kende
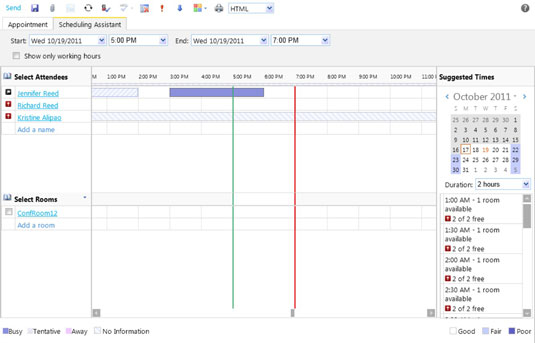
Brugerne af Office 365 er vant til en lidt anderledes grænseflade i e-mail-klienten. At sende en invitation, det er nødvendigt at bruge Planlægningsassistent hvor det er muligt at tilføje alle nødvendige oplysninger. Udover, brugerne af Office 365 har en nyttig mulighed for at tillade eller deaktivere videresendelse af denne mødeindkaldelse.
Sådan sender du en kalenderinvitation med flere datoer i Outlook: Nyttig funktion
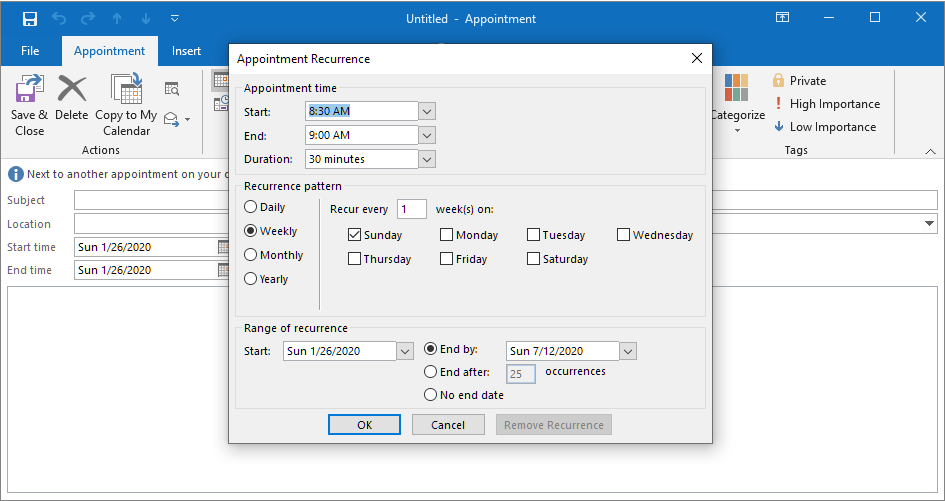
Når der er behov for at sende en invitation til aftalen, som skal gentages, der er to muligheder: regelmæssige og uregelmæssige møder. I det første tilfælde, åbne Ny aftale vindue ➯ find og tryk på knappen Tilbagevenden (Ctrl+G).

I dette vindue, du kan finde alle oplysninger relateret til forekomster og datointervaller for de møder, du planlægger.
Imidlertid, hvis møderne skal finde sted uregelmæssigt, gå frem som følger: start med trinene til, hvordan du sender en kalenderinvitation i Outlook 2013 eller enhver anden version ➯ opret og gem mødet ➯ gå til kalenderen og find denne aftale ➯ hold Ctrl nede, træk dette møde til en hvilken som helst dato, du har brug for, at det skal gentages ➯ gentag det forrige trin lige så mange gange, som aftalen skal gentages.
Alt i alt, Outlook er den klient, der er designet til at gøre proceskommunikationen ubesværet, hurtig, og mere effektiv. Gør brug af alle dets funktioner for at spare tid og være mere effektiv.